Useful Node-RED flow templates
9 minute read
Here we will show you a couple of Node-RED templates, which you can use to set up your dataprocessing and then customize them to your needs. Make sure to set up your mqtt-in and mqtt-out nodes to the proper addresses for your installation. The topics are usually left blank, as you need to configure the topic to your specific machines.
Installing packages
For many of these templates you need to install additional node packages. To install a new package, click on the three horizontal lines in the upper right corner to open the sidebar menu and click on “manage palette”

Open the “Install” tab, search for the desired package and press install on the package. New nodes should now show up in your library.
addShift
This flow is one of the more important ones, it sets a shift for every weekday from 9 to 5 and adds those shifts to the database. It also allows to start a shift with a button press on the injector node.
It requires the package node-red-contrib-cron-plus, so make sure to install it.

You can find the json template here.
Siemens S7 PLC Input
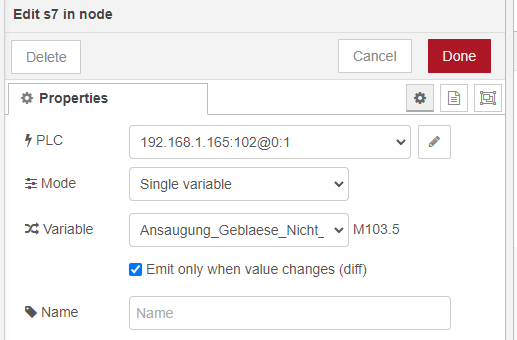
To read out Siemens S7 PLC data you need to utilize the package node-red-contrib-s7.
This template is just a simple s7 Input, which is then turned into the MQTT format and published by the MQTT-out node.

Set the IP address, port, rack and slot. These variables can be obtained from tia portal. In addition, it can be set how often the data of the PLC should be queried. When the settings have been made, click on “add” and you will automatically return to the S7 settings window.

The function replaces all null values with zeroes and processes the data into the MQTT format. You can find the json template here.
OPC UA Input
With Node-RED you can also process OPC UA type messages. For this you need to utilize the package node-red-contrib-opcua.

This template uses the timestamp node to ask for WAGO values every second. The Item nodes with the different topics are then connected to the client, which is reading the messages out and then giving them to the function, which clears null values and gives the message a topic based on the message type. Be aware it publishes them as ia/raw/. messages and is not incorporated into our more sophisticated data model.
You can find the json template here.
MQTT Button Bar
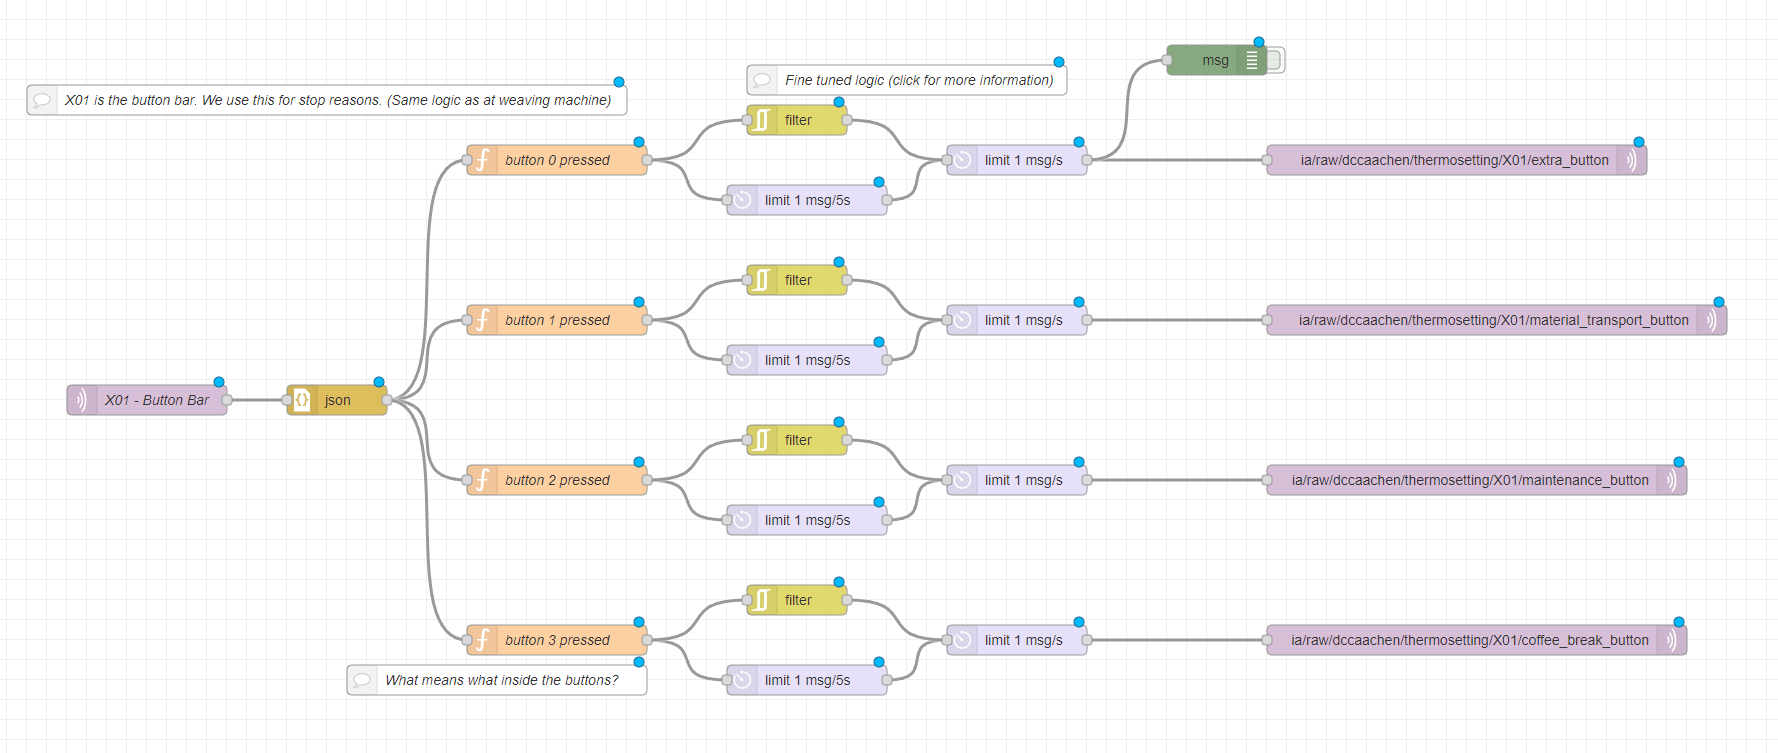
Using a button bar with MQTT is fairly easy. If you have a MQTT message sending button bar, look up in which topic it is publishing messages. You then can choose different processing paths for each button. In the template for example, you can start a coffee break with the press of the first button. You can customize what the buttons do by changing the function of that path.

You can find the json template here, it also has some additional information on the way the flow works.
MQTT Optical Distance Sensor
You can use an optical distance sensor to for a variety of things. In this template it is used to count items traveling through a checkpoint on a conveyor belt. For this template, you need to install the package node-red-contrib-edge-trigger.

The rising-edge node is triggered when the distance was below the threshold that is listed in the node and is rising above it. Note that this flow uses a subflow to send the count message; double-click it in the node library on the left to open it and customize the nodes in the subflow.
You can find the json template here.
MQTT Inductive Sensor
An inductive sensor can be used for a lot of different things on a shopfloor, for example you could do a similar thing like the optical sensor flow. However, here it is used to trigger a switch into a preventive maintenance stop (code 210000).

You can find the json template here.
Activity Processing
Activity is a little more complicated. You need a machine, that sends a variable that is always available and changes, when you want its activity to change. One example would be a fan, which sends one type of message when rotating and another when it is not rotating. As each machine gives off different values for these activity values, you will most likely adjust these templates a little more than usual. You can adjust these flows to use whatever your machine is sending when it is active to customize it to your liking and send out activity messages.

In the first flow, which you can find here, takes a boolean value, turns it into a binary value (1 for on, 0 for off) and then publishes the message back.

In the second flow, which you can find here, is more complicated. It looks at two different values of two different cylinders of the same machine. If both cylinders are running, it returns a message with activity 1, if not, then it send an activity of 0.
Count Processing
The count needs a function dependent on a variable that counts the parts the machine produces. It does not sum up the count to an overall-count. This part is done automatically by grafana! Counts can also be floats if needed. This means count is a message type that can mean fairly different things depending on the context you are giving it.
This flow can look very different depending on what you want from the count value, it could count the length of produced product, it could send a 1 value everytime an item is produced, or anything else really. In this example it calculates the difference between the last value it received and the current value it receives. Then the difference is sent out as the payload of a count message.

You can find the json template here.
Custom Processvalues
As custom ProcessValues can be basically anything, you can get basically as creative as you want. All you need to take care of is how to name the topic, the topic structure needs to end with /processValue/<unique name for your processvalue> if the value is a number and /processValueString/<unique name for your processvalue> if it is a string.
These flows can be as simple or as complicated as you want them to be, the template just reads out a numerical message and then sends a /processvalue/evenodd message that is either 0 if it is even or 1 if it is odd.

You can find that basic template here, although the possibilities here are much larger and depending on what you want to do, you might need to install some packages.
DetectAnomaly
In this flow we are taking a message, that is sent when a machine is not working as intended. For this flow to work, you need the node-red-contrib-edge-trigger package. The flow takes the message in, converts it into a binary value (1 if true, 0 if false). If an error message is coming in, it registers as 1 and goes through the rising edge node, which triggers because it went above the threshold of 0.999. Then a message is constructed and sent with the topic of …/detectedAnomaly and a payload of the name of the error message to give you an idea what went wrong.

If there are multiple messages, that would count as an anomaly you can even add additional branches to address all of them, which would look somewhat like this.

You can find the basic template here, although make sure you adjust the nodes to fit to the error messages of your specific machine.
State
There are two different ways to handle states. One would be to monitor the activity of the machine and extrapolate the state of the machine from it, another way to do it to get the machine state through manual input from a worker, e.g. through a button bar.
As already alluded to, the first way is to simply setup a flow to put out the activity and then have the state flow read that activity and infer from that, that the machine is either in an unspecified stop or running properly. When activity is 0, the switch goes into the function to send a stop state, and when activity is 1 it sends a full speed state.

As you might have noticed, the first flow is fairly simple and does not allow for more intricate states to be set. These can be set manually e.g. through a button bar. One example of a state, that would make sense on a button bar, would be a planned stop, a maintenance stop or an operator break.

You can find the acitivity based state flow here and the button bar state flow here.
Simulated Data Converter
This template comes from the community contributor Amine Amaach, special thanks to him!

It takes the simulated machine messages published (which are Humidity, Temperature and Pressure) and turns them into processvalue/# (like ia/<customer>/<location>/<asset>/processValue/ Humidity)messages, and publishes them out as MQTT messages again. You can copy the template here.
Simulated mqtt data flow
This is the template of our **Creating a Node-RED flow with simulated MQTT data -**guide. Make sure to check it out if you want to learn more about it.

You can copy the template here.
Simulated PackML data flow
This is the template of our **Creating a Node-RED flow with simulated PackML data -**guide. Make sure to check it out if you want to learn more about it.

You can copy the template here.
Simulated OPC-UA data flow
This is the template of our Creating a Node-RED flow with simulated OPC-UA data **-**guide. Make sure to check it out if you want to learn more about it. For this

You can copy the template here.
Exporting Kafka data with a Node-RED flow
With this flow you can export kafka data. Although you can also do that through kowl, it can sometimes lead to problems, especially with binary data. The tutorial shows you how the flow it works with our simulated temperature data. It imports kafka messages, converts them to base64 and then exports them. Make sure to adjust the path to export it to where you want it to be.
For this flow you need to export the packages node-red-contrib-kafkajs and node-red-contrib-base64.
You can copy the template here.

Deleting assets from database through Node-RED
With this flow you can delete assets from your database tables and with a little bit of adjustment, basically remove things you do not want to keep in your database. This flow is a community contribution from Daniel H. To delete the assets you need to import the package digitaloak/node-red-contrib-digitaloak-postgresql. Next you need to adjust the postgresql query node to connect to your database. Finally change the value in the second node to represent the asset you want to delete. After deploying the flow, press the inject button to delete the asset.
You can copy the template here.
